The first parameter that is passed is the assembly code itself. It’ll be in AT&T syntax, but will also have some extra rules apply to it which will allow for the compiler to make some decisions for you. The outputs, inputs and clobbers are optional lists consisting of directives instructing the compiler how to handle inputs, outputs and what’s expected to be trashed (clobbered) in your assembly block.
A simple example usage, to add two integers and return the result might look like this:
edx and ecx were chosen as our general purpose registers for inputs, so they’re loaded first-up.
The addition occurs and then the result (as requested) is placed in the memory location of our output.
Back in the inline code, you can see that these registers have been symbolically referenced as %1, %2, etc.
Outputs are a mix of constraints and modifiers, inputs are just constraints and clobbers list out what was modified (register-wise or other).
What about volatile?
The volatile keyword allows you to tell the compiler to not optimise away our code if it deems that it isn’t required (i.e. is has no effect on anything).
Constraints
Constraint
Description
m
Any kind of a memory address
o
Memory address if it’s offsettable
V
Memory address if it’s not offsettable
<
Memory with autodecrement addressing
>
Memory with autoincrement addressing
r
General purpose register
i
Immediate integer value
n
Immediate integer with a known value
I . . P
Range based immediate integer values
E
Immediate format-dependent floating point number
F
Immediate floating point number
G, H
Range based immediate float values
s
Immediate integer that is not an explicit integer
g
Any register, memory or immediate value; not a general purpose register though
X
Any operand is allowed
p
Any operand that is a valid memory address
A full description of all of these constraints can be found here.
Modifiers
Modifier
Description
=
Operand is written to
+
Operand is read from and written to
&
Operand is written to (clobbered) before input operands are used
%
Instruction is cumulative for this operand
A full description of all of these modifiers can be found here.
Clobbers
Clobber
Description
cc
Flags are modified
memory
Memory outside of what is in the constraints is modified
In today’s post, I want to present a dead-simple C program that we’ll compile into an object file and then use objdump to give us some assembly code. I’ll then take you through the generated assembly.
Using objdump
According to its manpage, objdump is used to dsplay information from object files. It has a whole host of different switches that you can supply to interrogate object files, but we’ll only have a very simple usage for it in this post.
I prefer Intel assembly syntax, so I’ll specify -M intel. We want to disassemble the object file, so we’ll use -d. It’s really helpful to also have the original source code intermixed with the assembly code, so we’ll turn that on with -S.
Your command should look something like this
objdump -d-M intel -S yourobjectfile.o
Simple example
The most basic program to look at is one that does nothing but return 0 back to the operating system.
intmain(intargc,char*argv[]){return0;}
Compiling this unit (ensuring to specify -g to gcc for debug symbols) and then disassembling with objdump, we’re given back the following:
Whilst the whole block that gets dumped out is important, we’re really only worried about the inner implementation of the main function call. The translation of this code is equally pretty simple.
push   rbp
mov    rbp,rsp
mov    DWORD PTR [rbp-0x4],edi
mov    QWORD PTR [rbp-0x10],rsi

mov    eax,0x0
pop    rbp
ret
Dissecting this code, we can see that the program first sets up the stack frame for the two parameters passed into main, argc and argv.
So, we save the previous rbp to preserve its state.
The first six integer or pointer arguments are passed in registers RDI, RSI, RDX, RCX, R8, and R9, while XMM0, XMM1, XMM2, XMM3, XMM4, XMM5, XMM6 and XMM7 are used for floating point arguments.
Therefore, argc being of type int is therefore a DWORD and is passed via edi. argv is a pointer and is a QWORD; therefore it is passed using the 64 bit register rsi.
Upon entry, we’re just filling up those spots in the stack.
Exiting we’re just setting our return value (which is always in the accumulator), restoring the pre-entry value that was in rbp and returning to the caller.
mov    eax,0x0
pop    rbp
ret
Write another, more complex C program; disassemble it and see if you can follow along with the results.
In today’s post, I’m going to go over a very old technique for working with fractional numbers. Fixed point numbers are defined by dividing an integral data type (8, 16, 32 or 64 bit) word into a whole part and fractional part.
The idea
So, what you do is you need to split your number into a whole part and fractional part. This means you dedicate some bit-space of your word to both. For a simple example, let’s work with an byte (traditioanlly 8 bits) and split the number evenly giving the whole part 4 bits as well as the fractional part.
0 0 0 0 0 0 0 0
------- -------
   |       |
 Whole   Frac
Above, we see our number represented in binary with all 8 bits laid out. The upper 4 bits are dedicated to the whole part, the lower 4 bits to the fractional.
The whole part
In this scenario (of a 4:4) split, you’ve probably already worked out that the maximum whole value we can hold is 15. Some example numbers as they appear might be:
First thing you’ll notice is, every number is effectivly shifted 4 bits to the left. This is how you load a fixed point number into memory. You shift the original integer to the left by the number of bits you have allocated for the fractional part.
Nothing overly special here. The fractional part is a little different to think about, but still makes sense.
The fractional part
As above, we’ve dedicated 4 bits to our fractional part as well. With binary numbers, the value of the bit slots go up in powers of two; going in the opposite direction they also go down in powers of two. With normal numbers, bit slot 0 actually corresponds to 2^0. By sliding this bit slot up by four, we effectivly start counting negative powers into the fractional part:
Using this knowledge, we can start to treat the lower 4 bits as the fractional part of the number. Even bit shifting (multiplication by 2) works as you’d expect:
All we did was shift the first number by 1 slot to the left. This has the overall effect of multiplying the number by 2 - makes sense, we’re in binary after all.
Ok, let’s take a look at how some simple operations work in code.
Show your working
Working with a 4:4 fixed point number is fine for pen-and-paper type stuff, but we’ll want to scale that up once we start to work with code. We’ll target a 16 bit number now, using the lower 6 bits for fractionals so the number is now a 10:6.
First off, we’ll want to be able to load our numbers. As above, this is as simple as shifting the numbers left by the number of bits we have dedicated to the fractional portion of our number. In this case, 6.
mov		ah, 5
shl		ah, 6
Of course, to get our whole number back again; all we do is shift a fixed point number to the right by the same number of bits again. Getting the fractional part of the number back out, again, depends on how many bits you have dedicated to the number’s precision (or fractional part). Because we’ve dedicated 6, this means the smallest number (and therefore the most accurate precision) we can use is actually 0.015625. We only have 6 bits precision, which gives us a range of 0-63.
This formula is what you’d use to get the fractional part of our number:
2^(-(number-of-bits)) * (lower-number-of-bits)
So, if we had the number 0.25 which would be represented by 0000000000010000, we can extract 0.25 from this using the formula above:
lower 6 bits = 010000 = 16
2^(-6) * 16 = 0.25
Addition and subtraction are handled just like normal. Nothing special needs to happen here. Multiplication and Division both require a little more effort.
Once you’ve performed your multiplication, you need to adjust the product by the number of fractional bits to the right.
mov     ax, 10      ; 10 * 10
shl     ax, 6
mov     bx, 10
shl     bx, 6

imul    bx          ; perform the multiplication
                    ; result will now be in dx:ax

add     ax, 32      ; add the bit boundary
adc     dx, 0       ; adjust for any carry

shrd    ax, dx, 6   ; shift the top 6 bits of dx into ax
Division requires a little more care as well. We pre-prepare the numbers by shifting them by the whole part prior to operation.
mov     dx, 10      ; 10 / 4
shl     dx, 6
mov     bx, 4
shl     bx, 6

xor     ax, ax		  ; ax = 0
shrd    ax, dx, 10  ; shift the top 10 bits of dx into ax
sar     dx, 10      ; shift and rotate 10

idiv    bx			  ; perform the division
Whilst these operations are more complex than their natural analogues, you can see that there’s not that much too them.
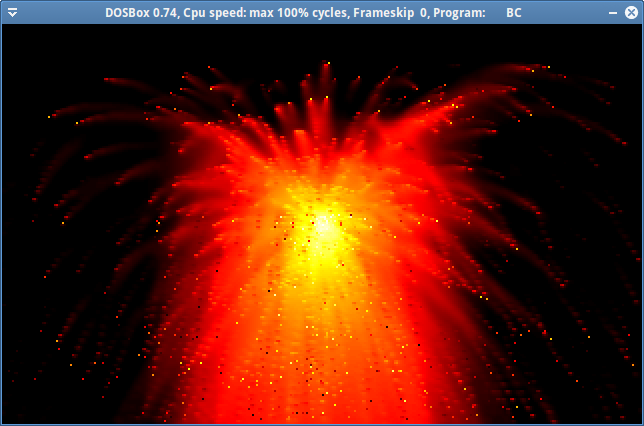
Time to do another write up on an old demo effect that’s always a crowd pleaser. A particle system. In today’s post, this particle system will act like a geyser of pixels acting under gravity that will appear to burn as the tumble down the screen.
We’re working in old school mode 13 (320x200x256) today in DOS.
Trust me. It looks a lot more impressive when it’s animating!
The envrionment
First of all, we’ll start off by defining some global, environment level constants that will control the simulation for us. It’s always good to define this information as constants as it allows for quick tweaking.
#define PARTICLE_COUNT		1000
#define GRAVITY				0.1f
PARTICLE_COUNT will control the number of particles in total for our simulation and GRAVITY controls the amount of pull on the y-axis that the particles will experience whilst they’re in the simulation.
Next, we need to define the particles themselves.
What’s a particle
The data that makes up a particle is a position (x and y), a velocity (vx and vy), life and decay. The velocity variables (vx and vy) impact the position variables (x and y) after each frame of animation. The GRAVITY constant impatcs the y velocity (vy) in such a way that all particles are biased towards the bottom of the screen over time. The decay variable is used to determine how much life is lost from the particle per frame and finally life itself determines how far through the colour scale that the particle should be drawn.
The life variable is tightly related to the way that we setup our indexed palette also. With life starting at 255.0f; making its way to 0.0f we interpolate its value over a 255..0 range so that it can directly correspond to a colour index. The way the colour index is setup, a particle at its strongest life will be white; it’ll move its way through yellow, orange to red finally ending at black (which will be 0).
From these variables (per particle) we can animate its rather short-life on screen. We can easily wrap all of this information up into a structure:
There are some default actions that we need to define for these particles though. We really need a way to initialise, render and update them in order to animate their characteristics appropriately.
All of the functions that are written for this particle system operate on an array index. The array itself is globally defined.
Initialisation is just setting some starting values for the particle. You can play with these values to taste, but I personally like a random velocity (in any direction):
As I said above, we’re in mode 13. We’ve got 320x200 pixels to work with, so I start all particles off in the centre of the screen. Velocities are set using the standard random number generator inside of libc. life starts at the top of the spectrum and decay is defined very, very close to 1.0f.
Rendering a particle is dead-simple. We just draw a pixel on the screen.
The position is augmented by the velocity, the y velocity by the gravity and life by the decay. vx is also adjusted by multiplication of a constant very close to 1.0f. This is just to dampen the particle’s spread on the x-axis.
Finally, if a particle has move outside of its renderable environment or it’s dead we just re-initialize it.
The secret sauce
If this is where we left the simulation, it’d look pretty sucky. Not only would we just have a fountain of pixels, but nothing would really appear to animate as your screen filled up with pixelated arcs following the colour palette spectrum that’d been setup.
We average the colour of the pixels on screen to give the particle system a glow (or bloom). This also works well with not clearing the screen before every re-draw as we want the trails of the particles left around so that they’ll appear to burn up.
Direct access to video memory through assembly language allows us to get this done in a nice, tight loop:
In today’s post, I’m just going to gloss over some top level details in developing applications that use Berkeley DB.
What is it?
The first line of the Wikipedia article for Berkeley DB sums the whole story up pretty well, I think:
Berkeley DB (BDB) is a software library that provides a high-performance embedded database for key/value data.
Pretty simple. Berkeley DB is going to offer you an in-process database to manage data in your applications in a little more organised approach.
Getting installed
I’m using Debian Linux, more specifically the testing release. I’m sure the installation process will translate for other Debian releases and/or other Linux distributions with their respective package managers.
If you’ve already got a standard development/build environment running, you won’t need the build-essential package listed below.
sudo apt-get install build-essential libdb-dev
Building applications
Once you’ve finished writing an application using this library, you’ll need to link the Berkeley DB library against your application. This is all pretty simple as well:
gcc -ldb yourapp.o -o yourapp
The key piece being the -ldb linker library switch.
Some simple operations
The following blocks of code are heavily based off of the information contained in this pdf. That pdf has a heap of information in it well worth the read if you’re going to do something serious with Berkeley DB.
First thing you need to do, is to initialize the database structure that you’ll use to conduct all of your operations.
DB*db;intret;/* setup the database memory structure */ret=db_create(&db,NULL,0);
db_create will allocate and fill out the structure of the DB typed pointer. It just sets it up ready for use. Once you’ve created the database handle, it’s time to actually open up a database (or create one).
open is going to try and find the requested database; (in my case test.db) and open it up. Failing that, it’ll create it (because of DB_CREATE). The format parameter is quite interesting. In the sample above, DB_BTREE has been specified. Looking at the DB->open() documentation:
The currently supported Berkeley DB file formats (or access methods) are Btree, Hash, Queue, and Recno. The Btree format is a representation of a sorted, balanced tree structure. The Hash format is an extensible, dynamic hashing scheme. The Queue format supports fast access to fixed-length records accessed sequentially or by logical record number. The Recno format supports fixed- or variable-length records, accessed sequentially or by logical record number, and optionally backed by a flat text file.
This gives you the flexability to use the format that suits your application best.
Once the database is open, writing data into it is as easy as specifying a key and value. There are some further data structures that need to be filled out, but the code is pretty easy to follow:
/* source data values */char*name="John Smith";intid=5;DBTkey,value;memset(&key,0,sizeof(DBT));memset(&value,0,sizeof(DBT));/* setup the key */key.data=&id;key.size=sizeof(int);/* setup the value */value.data=name;value.size=strlen(name)+1;/* write it into the database */ret=db->put(db,NULL,&key,&value,DB_NOOVERWRITE);
As the data member of the DBT struct is typed out as void *, you can store any information you’d like in there. Of course, you must specify the size so the system knows how much to write.
Reading values back out into native variables is just as easy:
/* destinations */charread_name[256];intread_id=5;memset(&key,0,sizeof(DBT));memset(&value,0,sizeof(DBT));/* setup the key to read */key.data=&read_id;key.size=sizeof(int);/* setup the value to fill */value.data=read_name;value.ulen=256;value.flags=DB_DBT_USERMEM;db->get(db,NULL,&key,&value,0);
Finally, you’ll want to close your database once you’re done: