systemd is a set of basic tools that any system can use to build more sophisticated service applications. Using these building you can
create units which can be a:
service
socket
device
mount
automount
swap
target
path
timer
slice
scope
In today’s article, we’ll go through an example that uses service and socket to build a simple server.
Hello, World
To start with, let’s create a “Hello, World” service that will do nothing more than take your connection and send you back the string "Hello, world". First we define our service in a file. Ours is hw.service.
You can install this at ~/.config/systemd/user/hw.service.
# hw.service
[Unit]
Description=Hello World Service
After=network.target hw.socket
Requires=hw.socket

[Service]
Type=simple
ExecStart=/usr/bin/python3 %h/tmp/serve.py
TimeoutStopSec=5

[Install]
WantedBy=default.target
The ExecStart holds what systemd will hand the socket connection off to. In this case, we’re going to hand the connection off to a python socket server running from our ~/tmp directory.
You can see that our requires hw.socket. It needs to be up before it will respond to requests. You install this one at ~/.config/systemd/user/hw.socket.
Our socket will listen on 7777 waiting for connections.
The serve.py mentioned in the service file is what systemd will hand the connection off to. The implementation of that server is a simple socket server:
#!/usr/bin/env python3
fromsocketserverimportTCPServer,StreamRequestHandlerimportsocketimportloggingclassHandler(StreamRequestHandler):defhandle(self):self.data=self.rfile.readline().strip()logging.info("From <%s>: %s"%(self.client_address,self.data))self.wfile.write("Hello, world!\r\n".encode("utf-8"))classServer(TCPServer):# The constant would be better initialized by a systemd module
SYSTEMD_FIRST_SOCKET_FD=3def__init__(self,server_address,handler_cls):# ignore the bind/listen steps
TCPServer.__init__(self,server_address,handler_cls,bind_and_activate=False)# take the socket from systemd
self.socket=socket.fromfd(self.SYSTEMD_FIRST_SOCKET_FD,self.address_family,self.socket_type)if__name__=="__main__":logging.basicConfig(level=logging.INFO)# host and port values are ignored here
server=Server(("localhost",9999),Handler)server.serve_forever()
Inside of the Handler class, in the constructor you can see that we avoid the bind and listen steps. This is because systemd has already done this for us. We’re just
going to be handed a file descriptor with the socket already attached.
# ignore the bind/listen steps
TCPServer.__init__(self,server_address,handler_cls,bind_and_activate=False)# take the socket from systemd
self.socket=socket.fromfd(self.SYSTEMD_FIRST_SOCKET_FD,self.address_family,self.socket_type)
That’s exactly what’s happening with fromfd here. We’re given a socket to work with via descriptor 3.
The actual implementation of our handler is not doing much more than taking in the request data, and sending back "Hello World".
After you’ve tested it a few times, you’ll be albe to see requests in the logs.
journalctl -f--user-unit hw.service
You should see the lines from the logging.info calls.
Nov 05 18:23:15 ditto systemd[2245]: Started Hello World Service.
Nov 05 18:23:18 ditto python3[9883]: INFO:root:From <('127.0.0.1', 38292)>: b'Hello'
Cleaning up
Once you’re done and you’d like to remove these, simply stop the service, remove the units, and reload.
# stop the service
systemctl --user stop hw.socket
# remove the service and socketrm ~/.config/systemd/user/hw.*# reload systemd state
systemctl --user daemon-reload
The find utility is an extremely flexible query tool for
your file system. It allows you to navigate and traverse your folder structures.
From the man page:
This manual page documents the GNU version of find. GNU find searches the directory tree rooted at each given file name by evaluating the given expression from left to right, according to the rules of precedence (see section OPERATORS), until the outcome is known (the left hand side is false for and operations, true for or), at which point find moves on to the next file name.
In this article, we’ll go through some usages.
Find by name
You can simply find by name with the -name switch:
find /the/directory -name the-file-name.txt
You can also ignore case by switching out -name for -iname.
Find by permissions
If you’d like to find files with a specific permission (in this case 777):
find .-type f -perm 0777 -print
You can take the converse of this with !:
find .-type f !-perm 0777 -print
Average file size
Let’s say you have a directory of text files, and you’d like to find the average size of them.
By joining find with awk, you can use the following to do just that:
find .-type f -execwc-w{}\; | awk'{numfiles=numfiles+1;total += $1} END{print total/numfiles}'
Random sampling
You may need to take a random sample of files in a given folder. You can start this process off
with find, and then through clever usage of sort, and tail you can get a random sample.
This will take 500 random files from a directory:
find /the/path -type f -print0 | sort-zR | head-zn 500
find /the/path -type f -print0 prints out the files using \0 as a delimiter thanks to -print0.
sort is told to use \0 as its delimiter with -z and -R is to sort them randomly.
head now takes the first 500, again using \0 as the delimiter.
The Apache Parquet file format is used widely in the data space. It’s a column-oriented format that focuses on storing data as efficiently as possible, with emphasis on data retrieval.
Why?
The most common storage format that you’d use to hold data is CSV. It’s a good, simple format but has quite a number of short-comings when it comes to data analysis.
Parquet is a column-oriented format which is much more sympathetic to data analysis. CSV is row-oriented, which is a much better application for an OLTP scenario.
Parquet offers compression and partitioning that is simply not available to the CSV format.
So, it stores information - but is better suited to the data warehouse idea.
Python
A really easy way to get started using Parquet is with Python. The PyArrow library is a set of utilities that allow you to work with in-memory analytics tools. PyArrow plays nicely with Pandas and NumPy so it’s a good fit.
Make sure you have pyarrow installed as a dependency.
libuv is a multi-platform library that provides your
programs with asynchronous capabilities through the use of an event loop. node.js has been the most mainstream usage of this library.
Today’s post will talk about this library and show some working examples.
When you’re programming in an event-driven environment, you need a medium that can transfer control over to your program when an event occurs. The event loop’s job is to do exactly this, running forever.
If you were to think about it in c-pseudo code, it might look something like this.
The list of handles that can send us events, and signal our application are here:
/* Handle types. */typedefstructuv_loop_suv_loop_t;typedefstructuv_handle_suv_handle_t;typedefstructuv_stream_suv_stream_t;typedefstructuv_tcp_suv_tcp_t;typedefstructuv_udp_suv_udp_t;typedefstructuv_pipe_suv_pipe_t;typedefstructuv_tty_suv_tty_t;typedefstructuv_poll_suv_poll_t;typedefstructuv_timer_suv_timer_t;typedefstructuv_prepare_suv_prepare_t;typedefstructuv_check_suv_check_t;typedefstructuv_idle_suv_idle_t;typedefstructuv_async_suv_async_t;typedefstructuv_process_suv_process_t;typedefstructuv_fs_event_suv_fs_event_t;typedefstructuv_fs_poll_suv_fs_poll_t;typedefstructuv_signal_suv_signal_t;/* Request types. */typedefstructuv_req_suv_req_t;typedefstructuv_getaddrinfo_suv_getaddrinfo_t;typedefstructuv_getnameinfo_suv_getnameinfo_t;typedefstructuv_shutdown_suv_shutdown_t;typedefstructuv_write_suv_write_t;typedefstructuv_connect_suv_connect_t;typedefstructuv_udp_send_suv_udp_send_t;typedefstructuv_fs_suv_fs_t;typedefstructuv_work_suv_work_t;/* None of the above. */typedefstructuv_cpu_info_suv_cpu_info_t;typedefstructuv_interface_address_suv_interface_address_t;typedefstructuv_dirent_suv_dirent_t;
These are the handles that we can register interest in; so the system will raise interesting events to us.
Get started
Before we get started, the libuv library needs to be installed along with the development files. In order to do this on my Debian machine, I’ll install the development and the runtime files.
Now, when we build an executable we need to link to the uv library using -luv. For the CMake test application that I’m writing with this article, I used:
target_link_libraries(uvtest uv)
Where uvtest is the name of my application.
First program
The “hello, world” of event loops. We’ll allocate the event loop, run the loop, and then cleanup.
intmain(){/* allocate and init the loop */uv_loop_t*loop=malloc(sizeof(uv_loop_t));uv_loop_init(loop);/* run the loop */uv_run(loop,UV_RUN_DEFAULT);/* clean up */uv_loop_close(loop);free(loop);return0;}
Idle
While our program is doing “nothing”, waiting for the next event we can register a function to execute. You’ll notice in this code that we’re using a uv_idle_t rather than a uv_loop_t (as above). Using uv_idle_t provides us access to register an “idler” function.
When you’re writing demos in 320x200 mode, you can quickly estimate X and Y coordinates from a screen offset with one simple multiply. That value that you use is 0xcccd, and it’s called the Rrrola Constant.
To start this, we need to adjust our video address. Remember, this is an estimate (it’s good enough); but it does need a bit more “help” in the setup.
push0xa000-10popestop:xordi,dimovcx,64000
Right now, es:[di] is pointing to the start of video memory (adjusted).
Now we perform the multiply
pat:movax,0xcccdmuldi
At this point the (x, y) pair is now available to us in (dh, dl). This is really handy for use in your rendering functions.
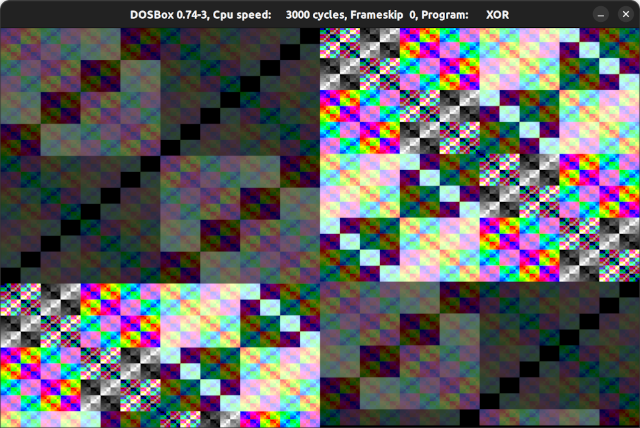
In this example, we just make a pixel that’s x xor y.
xordh,dlmoval,dhstosblooppat
This works because the offset into the video buffer is worked out as (y * 320) + x. Multiplying this formula out by Oxcccd we end up with (y * 0x1000040) + (x * 0xcccd)
The top byte is y * 0x1000000. The next byte along is now (x * 0xcccd / 0x10000) which approximates to (x * 256/320), which is useful to us. The lower two bytes from the product are garbage.
Full example
The following is a .com demo-style example which uses the above technique:
org100hstart:; setup 320x200x256movax,0x0013int0x10; adjust screen segment to work; with the Rrrloa trickpush0xa000-10popestop:; start at the beginning of; the video bufferxordi,dimovcx,64000pat:; (dh, dl) -> (x, y)movax,0xcccdmuldi; col = x ^ yxordh,dlmoval,dh; paintstosblooppat; check for escinal,60hcmpal,1jnetop; return to textmovax,0x0003int0x10; return to dosmovax,0x4c00int0x21