The quadratic equation is one of the fundamental concepts in algebra and forms the basis of many more complex topics in
mathematics and computer science. It has the general form:
\[ax^2 + bx + c = 0\]
where \(a\), \(b\), and \(c\) are constants, and \(x\) represents the unknown variable.
In this post, we’ll explore:
What the quadratic equation represents
How to solve it using the quadratic formula
How to implement this solution in Haskell
What Is a Quadratic Equation?
A quadratic equation is a second-degree polynomial equation. This means the highest exponent of the variable \(x\) is 2.
Quadratic equations typically describe parabolas when plotted on a graph.
The Quadratic Formula
The quadratic formula provides a method to find the values of \(x\) that satisfy the equation. The formula is:
\[x = \frac{-b \pm \sqrt{b^2 - 4ac}}{2a}\]
Here, the expression \(b^2 - 4ac\) is called the discriminant, and it plays a key role in determining the nature
of the solutions:
If the discriminant is positive, the equation has two real and distinct roots.
If the discriminant is zero, the equation has one real (repeated) root.
If the discriminant is negative, the equation has two complex roots.
Step-by-Step Solution
Calculate the Discriminant:
The discriminant, \(\Delta\), is given by:
\(\Delta = b^2 - 4ac\)
Evaluate the Roots:
Using the discriminant, you can find the roots by plugging the values into the quadratic formula:
\(x_1 = \frac{-b + \sqrt{\Delta}}{2a}, \quad x_2 = \frac{-b - \sqrt{\Delta}}{2a}\)
If \(\Delta < 0\), the square root term involves imaginary numbers, leading to complex solutions.
Haskell Implementation
Now let’s translate this mathematical solution into a Haskell function. Haskell is a functional programming language
with a strong emphasis on immutability and mathematical precision, making it an excellent choice for implementing
mathematical algorithms.
Below, we’ll create a function quadraticSolver that:
Takes the coefficients \(a\), \(b\), and \(c\) as inputs.
Computes the discriminant.
Determines the nature of the roots based on the discriminant.
Returns the roots of the quadratic equation.
-- Haskell implementation of solving a quadratic equationimportText.Printf(printf)-- Function to solve the quadratic equationquadraticSolver::(RealFloata,Showa)=>a->a->a->StringquadraticSolverabc|discriminant>0=printf"Two real roots: x1 = %.2f, x2 = %.2f"x1x2|discriminant==0=printf"One real root: x = %.2f"x1|otherwise=printf"Two complex roots: x1 = %.2f + %.2fi, x2 = %.2f - %.2fi"realPartimaginaryPartrealPartimaginaryPartwherediscriminant=b^2-4*a*cx1=(-b+sqrtdiscriminant)/(2*a)x2=(-b-sqrtdiscriminant)/(2*a)realPart=-b/(2*a)imaginaryPart=sqrt(absdiscriminant)/(2*a)-- Example usagemain::IO()main=doputStrLn"Enter coefficients a, b, and c:"a<-readLnb<-readLnc<-readLnputStrLn$quadraticSolverabc
Code Breakdown:
Imports:
We import the Text.Printf module to format the output to two decimal places.
quadraticSolver Function:
This function takes three arguments: \(a\), \(b\), and \(c\).
It computes the discriminant using the formula \(\Delta = b^2 - 4ac\).
It checks the value of the discriminant using Haskell’s guards (|), and based on its value, it computes the roots.
If the discriminant is negative, we compute the real and imaginary parts separately and display the complex roots in the form \(x = a + bi\).
main Function:
The main function prompts the user to input the coefficients \(a\), \(b\), and \(c\).
It then calls quadraticSolver to compute and display the roots.
Example Run
Let’s assume we are solving the equation \(x^2 - 3x + 2 = 0\), where \(a = 1\), \(b = -3\), and \(c = 2\).
Enter coefficients a, b, and c:
1
-3
2
Two real roots: x1 = 2.00, x2 = 1.00
If we try solving the equation \(x^2 + 2x + 5 = 0\), where \(a = 1\), \(b = 2\), and \(c = 5\).
Enter coefficients a, b, and c:
1
2
5
Two complex roots: x1 = -1.00 + 2.00i, x2 = -1.00 - 2.00i
Conclusion
The quadratic equation is a simple but powerful mathematical tool. In this post, we derived the quadratic formula,
discussed how the discriminant affects the solutions, and implemented it in Haskell. The solution handles both real and
complex roots elegantly, thanks to Haskell’s functional paradigm.
In this post, we’ll explore the foundations of 3D graphics, focusing on vector math, matrices, and transformations. By
the end, you’ll understand how objects are transformed in 3D space and projected onto the screen. We’ll use Haskell for
the code examples, as it closely resembles the mathematical operations involved.
Vectors
A 4D vector has four components: \(x\), \(y\), \(z\), and \(w\).
In 3D graphics, we often work with 4D vectors (also called homogeneous coordinates) rather than 3D vectors. The
extra dimension allows us to represent translations (which are not linear transformations) as matrix operations,
keeping the math uniform.
A 4D vector is written as:
\[\boldsymbol{v} = \begin{bmatrix} x \\ y \\ z \\ w \end{bmatrix}\]
Where:
\(x, y, z\) represent the position in 3D space
\(w\) is a homogeneous coordinate that allows us to apply translations and perspective transformations.
The extra \(w\)-component is crucial for distinguishing between points and directions (i.e., vectors). When
\(w = 1\), the vector represents a point. When \(w = 0\), it represents a direction or vector.
Operations
We need to perform various operations on vectors in 3D space (or 4D homogeneous space), including addition, subtraction,
multiplication, dot products, and normalization.
Addition
Given two vectors \(\boldsymbol{a}\) and \(\boldsymbol{b}\):
The cross product is a vector operation that takes two 3D vectors and returns a third vector that is orthogonal
(perpendicular) to both of the input vectors. The cross product is commonly used in 3D graphics to calculate surface
normals, among other things.
For two 3D vectors \(\boldsymbol{a}\) and \(\boldsymbol{b}\), the cross product \(\boldsymbol{a} \times \boldsymbol{b}\)
is defined as:
This resulting vector is perpendicular to both \(\boldsymbol{a}\) and \(\boldsymbol{b}\).
To implement the cross product in Haskell, we will only operate on the \(x\), \(y\), and \(z\) components of a
Vec4 (ignoring \(w\)) since the cross product is defined for 3D vectors.
-- Compute the cross product of two 3D vectorscross::Vec4->Vec4->Vec4cross(Vec4axayaz_)(Vec4bxbybz_)=Vec4((ay*bz)-(az*by))-- x component((az*bx)-(ax*bz))-- y component((ax*by)-(ay*bx))-- z component0-- w is zero for a direction vector
Length
The length or magnitude of a vector \(\boldsymbol{v}\) is:
In 3D graphics, transformations are applied to objects using 4x4 matrices. These matrices allow us to perform
operations like translation, scaling, and rotation.
Operations
Addition
Adding two matrices \(A\) and \(B\) is done element-wise:
We transform a vector by a matrix using a multiply operation.
\[\boldsymbol{v'} = M \cdot \boldsymbol{v}\]
-- Multiplying a 4D vector by a 4x4 matrixmulMV::Mat4->Vec4->Vec4mulMV(Mat4m00m01m02m03m10m11m12m13m20m21m22m23m30m31m32m33)(Vec4xyzw)=Vec4(m00*x+m01*y+m02*z+m03*w)(m10*x+m11*y+m12*z+m13*w)(m20*x+m21*y+m22*z+m23*w)(m30*x+m31*y+m32*z+m33*w)
3D Transformations
In 3D graphics, we apply transformations like translation, scaling, and rotation using matrices. These transformations
are applied to 4D vectors, and the operations are represented as matrix multiplications.
Identity Matrix
The identity matrix is a 4x4 matrix that leaves a vector unchanged when multiplied:
In 3D graphics, we frequently need to rotate objects around the X, Y, and Z axes. Each axis has its own
corresponding rotation matrix, which we use to apply the rotation transformation to points in 3D space.
A rotation around the X-axis by an angle \(\theta\) is represented by the following matrix:
To rotate an object in 3D space about multiple axes, we can multiply the individual rotation matrices. The order of
multiplication is crucial since matrix multiplication is not commutative. Typically, we perform rotations in the
order of Z, then Y, then X (if required).
To apply a rotation to an object, you can combine the rotation matrices and multiply them by the object’s position
vector. For instance, to rotate a point by \(\theta_x\), \(\theta_y\), and \(\theta_z\), you can multiply
the corresponding matrices:
-- Rotate a point by theta_x, theta_y, and theta_zletrotationMatrix=rotationXthetaX`mulM`rotationYthetaY`mulM`rotationZthetaZletrotatedPoint=mulMVrotationMatrixpointVec
3D Transformations and Projection
Local vs World Coordinates
When dealing with 3D objects, we distinguish between local coordinates (relative to an object) and
world coordinates (relative to the entire scene). Vectors are transformed from local to world coordinates by
multiplying them by transformation matrices.
Projection Calculation
To project a 3D point onto a 2D screen, we use a projection matrix. The projection matrix transforms 3D coordinates
into 2D coordinates by applying a perspective transformation.
A simple perspective projection matrix looks like this:
In 3D graphics, we often work with 4D vectors in homogeneous coordinates. To display a 3D point on a 2D screen, we need
to project that point using a projection matrix and then convert the resulting 4D vector into 2D coordinates that we
can draw on the screen.
Here’s how this process works:
Step 1: Apply the Projection Matrix
We start with a 4D vector \(\boldsymbol{v}\) in homogeneous coordinates:
\[\boldsymbol{v} = \begin{bmatrix} x \\ y \\ z \\ w \end{bmatrix}\]
We apply the projection matrix \(P\), which transforms the 4D point into clip space (a space where coordinates can be
projected to the screen).
The projection matrix looks something like this for perspective projection:
\[\boldsymbol{v'} = \begin{bmatrix} x' \\ y' \\ z' \\ w' \end{bmatrix} = P \cdot \begin{bmatrix} x \\ y \\ z \\ w \end{bmatrix}\]
Step 2: Perspective Divide
To convert the 4D vector \(\boldsymbol{v'}\) to 3D space, we perform the perspective divide. This means dividing
the \(x'\), \(y'\), and \(z'\) components by the \(w'\) component.
The resulting 3D point \(\boldsymbol{v_{3D}}\) is:
To get the final 2D screen coordinates, we need to convert the 3D point into normalized device coordinates (NDC),
which range from -1 to 1. The screen coordinates \((x_{\text{screen}}, y_{\text{screen}})\) are then obtained by
scaling these values to the screen dimensions:
The factor \(\frac{x_{3D} + 1}{2}\) maps the normalized \(x\)-coordinate from the range [-1, 1] to [0, 1], and
multiplying by the screen width gives us the pixel position. The same applies for \(y_{\text{screen}}\), but we invert
the \(y_{3D}\) coordinate to account for the fact that screen coordinates typically have the origin at the top-left
corner, whereas the NDC system has the origin at the center.
Putting it All Together in Haskell
Here’s how you can perform this transformation in Haskell:
-- Given a projection matrix and a 4D vector, project the vector to screen coordinatesprojectToScreen::Mat4->Vec4->Double->Double->(Double,Double)projectToScreenprojectionMatrixvecwidthheight=letVec4x'y'z'w'=mulMVprojectionMatrixvec-- Apply projection matrixx3D=x'/w'-- Perspective dividey3D=y'/w'-- Convert from NDC to screen coordinatesxScreen=(x3D+1)/2*widthyScreen=(1-y3D)/2*heightin(xScreen,yScreen)
Example
Suppose we have the following vector and projection matrix:
letvec=Vec41111-- 3D point (1, 1, 1)letprojectionMatrix=projection90(16/9)0.11000-- Field of view, aspect ratio, near/far planeslet(xScreen,yScreen)=projectToScreenprojectionMatrixvec19201080-- Screen resolution
This will give you the screen coordinates \(x_{\text{screen}}\) and \(y_{\text{screen}}\), where the 3D point
\((1, 1, 1)\) will be projected on a 1920x1080 display.
Conclusion
This has been some of the basic 3D concepts presented through Haskell. In future posts, we’ll use this code to create
some basic animations on screen.
Mounting CIFS (SMB) shares in Linux can be a convenient way to access network resources as part of the local filesystem.
In this guide, I’ll walk you through the steps for properly configuring a CIFS share in /etc/fstab on a Linux system.
I’ll also show you how to ensure that network mounts are available before services like Docker start up.
Step 1: Modify /etc/fstab
To mount a CIFS share automatically at boot, we need to modify the /etc/fstab file. First, open it in a text editor:
sudo vim /etc/fstab
Now, add or modify the CIFS entry in the file. A typical CIFS entry looks like this:
# Example CIFS line in fstab
//server_address/share_name /local/mount/point cifs credentials=/path/to/credentials,file_mode=0755,dir_mode=0755,uid=1000,gid=1000,_netdev 0 0
Explanation:
//server_address/share_name: The remote server and share you want to mount (e.g., //192.168.1.100/shared).
/local/mount/point: The local directory where the share will be mounted.
cifs: The filesystem type for CIFS/SMB.
credentials=/path/to/credentials: Points to a file containing your username and password (this is optional, but recommended for security).
file_mode=0755,dir_mode=0755: Sets the file and directory permissions for the mounted share.
uid=1000,gid=1000: Specifies the user and group IDs that should own the files (replace 1000 with your user/group IDs).
_netdev: Ensures that the mount waits for network availability before mounting.
0 0: The last two values are for dump and fsck; they can usually remain 0.
Step 2: Create a Credentials File
For better security, you can use a separate credentials file rather than hard-coding the username and password in /etc/fstab. To do this, create a file to store the username and password for the share:
sudo nano /path/to/credentials
Add the following lines to the file:
username=your_username
password=your_password
domain=your_domain   # (optional, if you're in a domain environment)
Make sure the credentials file is secure by setting appropriate permissions:
sudo chmod 600 /path/to/credentials
This ensures only the root user can read the file, which helps protect sensitive information.
Step 3: Test the Mount
After adding the CIFS line to /etc/fstab and configuring the credentials file, it’s time to test the mount. You can do this by running:
sudo mount -a
If everything is configured correctly, the CIFS share should mount automatically. If you encounter any issues, check the system logs for errors.
Use one of these commands to inspect the logs:
# On Ubuntu or Debian-based systemssudo tail /var/log/syslog
# On CentOS or RHEL-based systemssudo tail /var/log/messages
Ensuring Mounts are Available Before Docker
If you’re running Docker on the same system and need to ensure that your CIFS mounts are available before Docker starts, you’ll want to modify
Docker’s systemd service. Here’s how:
First, create a directory for Docker service overrides:
sudo mkdir-p /etc/systemd/system/docker.service.d
Next, create a custom override file:
sudo vim /etc/systemd/system/docker.service.d/override.conf
Now, Docker will wait for your CIFS mounts to be available before starting any containers that might rely on them.
By following these steps, you can ensure your CIFS shares are mounted reliably on boot and integrated seamlessly with other services like Docker.
This is especially useful for network-based resources that are critical to your containers or other local services.
Flickering can be a common problem when drawing graphics in a Windows application. One effective way to prevent this is by using a
technique called double buffering. In this article, we’ll walk through creating a simple Win32 application that uses double
buffering to provide smooth and flicker-free rendering.
Getting Started
First, let’s create a basic Win32 window and set up the message loop.
In this code, we define a WinMain function, which is the entry point for a Windows desktop application. We define a window class
and register it with the system, then create the window using CreateWindowEx.
The message loop waits for input messages, like key presses or mouse movements, and dispatches them to the appropriate window
procedure. We check for messages using PeekMessage so the loop remains responsive and can handle user input without blocking.
Creating the Buffer
Now, let’s modify the program to set up the back buffer for double buffering. We’ll do this by implementing the window procedure
(WindowProc) and handling key messages like WM_CREATE, WM_SIZE, and WM_DESTROY.
The WindowProc function handles window events such as creating the back buffer (WM_CREATE), resizing it (WM_SIZE),
and destroying it (WM_DESTROY). We also override WM_ERASEBKGND to prevent flickering by blocking the default
background erase.
Next, in the WM_PAINT handler, we use BitBlt to copy the contents of the memory device context (memDC) to the
window’s device context, effectively flipping the buffer and rendering the scene.
Drawing and Flipping
Now, we’ll define the RecreateBackBuffer and DestroyBackBuffer functions that manage the lifecycle of the buffer.
The RecreateBackBuffer function creates a new off-screen bitmap whenever the window is resized or created. The bitmap
is selected into the memory device context (memDC), which is used for all the off-screen drawing.
The DestroyBackBuffer function cleans up the memory device context, releasing the resources used by the back
buffer when the window is destroyed or the buffer is resized.
Animation Loop
To animate, we need to redraw the back buffer continually. Instead of relying solely on WM_PAINT, we can create
an animation loop that forces the screen to refresh at regular intervals.
A simple way to do this is to use SetTimer or a manual loop that invalidates the window periodically. Here’s
how you could structure the loop:
This change redraws the window about 60 times per second, perfect for smooth animations.
Conclusion
Double buffering is a powerful technique that enhances the visual quality of graphical applications by eliminating flickering
during rendering. By using an off-screen buffer to draw content before displaying it on the screen, we can ensure smooth
transitions and animations. In this article, we walked through setting up a basic Win32 window, creating and managing the
back buffer, and implementing a simple animation loop using double buffering.
With this foundation, you can now explore more complex drawing routines or incorporate this technique into larger projects
for better performance and visual appeal.
Ray tracing is a technique for generating an image by tracing the path of light as pixels in an image plane. It
simulates how rays of light interact with objects in a scene to produce realistic lighting, reflections, and shadows.
In this post, we’ll walk through building a simple raytracer in Haskell. We will start with basic vector math, define
shapes like spheres and cubes, and trace rays through the scene to generate an image. By the end, you’ll have a
raytracer that can render reflections and different shapes.
What You’ll Learn:
Basics of raytracing and the math behind it
How to define math primitives in Haskell
How to trace rays against shapes (including spheres and cubes)
How to generate an image from the traced rays
… a little math
Some Math Primitives
To begin, we need to define some basic 3D vector math. This is essential for all calculations involved in ray tracing:
adding vectors, calculating dot products, normalizing vectors, and more.
We’ll define a Vec3 data type to represent 3D vectors and functions for common vector operations.
-- Define a vector (x, y, z) and basic operationsdataVec3=Vec3{x::Double,y::Double,z::Double}deriving(Show,Eq)-- Vector additionadd::Vec3->Vec3->Vec3add(Vec3x1y1z1)(Vec3x2y2z2)=Vec3(x1+x2)(y1+y2)(z1+z2)-- Vector subtractionsub::Vec3->Vec3->Vec3sub(Vec3x1y1z1)(Vec3x2y2z2)=Vec3(x1-x2)(y1-y2)(z1-z2)-- Scalar multiplicationscale::Double->Vec3->Vec3scalea(Vec3x1y1z1)=Vec3(a*x1)(a*y1)(a*z1)-- Dot productdot::Vec3->Vec3->Doubledot(Vec3x1y1z1)(Vec3x2y2z2)=x1*x2+y1*y2+z1*z2-- Normalize a vectornormalize::Vec3->Vec3normalizev=scale(1/lenv)v-- Vector lengthlen::Vec3->Doublelen(Vec3x1y1z1)=sqrt(x1*x1+y1*y1+z1*z1)-- Reflect a vector v around the normal nreflect::Vec3->Vec3->Vec3reflectvn=subv(scale(2*dotvn)n)
Defining a Ray
The ray is the primary tool used to “trace” through the scene, checking for intersections with objects like
spheres or cubes.
A ray is defined by its origin \(O\) and direction \(D\). The parametric equation of a ray is:
\[P(t) = O + t \cdot D\]
Where:
\(O\) is the origin
\(D\) is the direction of the ray
\(t\) is a parameter that defines different points along the ray
-- A Ray with an origin and directiondataRay=Ray{origin::Vec3,direction::Vec3}deriving(Show,Eq)
Shapes
To trace rays against objects in the scene, we need to define the concept of a Shape. In Haskell, we’ll use a
typeclass to represent different types of shapes (such as spheres and cubes). The Shape typeclass will define methods
for calculating ray intersections and normals at intersection points.
ExistentialQuantification and Why We Need It
In Haskell, lists must contain elements of the same type. Since we want a list of various shapes (e.g., spheres and cubes),
we need a way to store different shapes in a homogeneous list. We achieve this by using existential quantification to
wrap each shape into a common ShapeWrapper.
{-# LANGUAGE ExistentialQuantification #-}-- Shape typeclassclassShapeawhereintersect::Ray->a->MaybeDoublenormalAt::a->Vec3->Vec3getColor::a->ColorgetReflectivity::a->Double-- A wrapper for any shape that implements the Shape typeclassdataShapeWrapper=foralla.Shapea=>ShapeWrappera-- Implement the Shape typeclass for ShapeWrapperinstanceShapeShapeWrapperwhereintersectray(ShapeWrappershape)=intersectrayshapenormalAt(ShapeWrappershape)=normalAtshapegetColor(ShapeWrappershape)=getColorshapegetReflectivity(ShapeWrappershape)=getReflectivityshape
Sphere
Sphere Equation
A sphere with center \(C = (c_x, c_y, c_z)\) and radius \(r\) satisfies the equation:
\[(x - c_x)^2 + (y - c_y)^2 + (z - c_z)^2 = r^2\]
In vector form:
\[\lVert P - C \rVert^2 = r^2\]
Where \(P\) is any point on the surface of the sphere, and \(\lVert P - C \rVert\) is the Euclidean distance
between \(P\) and the center \(C\).
Substituting the Ray into the Sphere Equation
We substitute the ray equation into the sphere equation:
\[\lVert O + t \cdot D - C \rVert^2 = r^2\]
Expanding this gives:
\[(O + t \cdot D - C) \cdot (O + t \cdot D - C) = r^2\]
Let \(L = O - C\), the vector from the ray origin to the sphere center:
The equation can be solved using the quadratic formula:
\[t = \frac{-b \pm \sqrt{b^2 - 4ac}}{2a}\]
Where:
a is defined as: \(a = D \cdot D\)
b is defined as: \(b = 2(L \cdot D)\)
c is defined as: \(c = L \cdot L - r^2\)
The discriminant \(\Delta = b^2 - 4ac\) determines the number of intersections:
\(\Delta < 0\): no intersection
\(\Delta = 0\): tangent to the sphere
\(\Delta > 0\): two intersection points
Here’s how we define a Sphere as a Shape with a center, radius, color, and reflectivity.
-- A Sphere with a center, radius, color, and reflectivitydataSphere=Sphere{center::Vec3,radius::Double,sphereColor::Color,sphereReflectivity::Double}deriving(Show,Eq)instanceShapeSpherewhereintersect(Rayod)(Spherecr__)=letoc=suboca=dotddb=2.0*dotocdc'=dotococ-r*rdiscriminant=b*b-4*a*c'inifdiscriminant<0thenNothingelseJust((-b-sqrtdiscriminant)/(2.0*a))normalAt(Spherec___)p=normalize(subpc)getColor(Sphere__color_)=colorgetReflectivity(Sphere___reflectivity)=reflectivity
Cube Definition
For a cube, we typically use an axis-aligned bounding box (AABB), which means the cube’s faces are aligned with the
coordinate axes. The problem of ray-cube intersection becomes checking where the ray crosses the planes of the box’s
sides.
The cube can be defined by two points: the minimum corner \(\text{minCorner} = (x_{\text{min}}, y_{\text{min}}, z_{\text{min}})\)
and the maximum corner \(\text{maxCorner} = (x_{\text{max}}, y_{\text{max}}, z_{\text{max}})\). The intersection
algorithm involves calculating for each axis independently and then combining the results.
Cube Planes and Ray Intersections
For each axis (x, y, z), the cube has two planes: one at the minimum bound and one at the maximum bound. The idea is to
calculate the intersections of the ray with each of these planes.
For the x-axis, for example, we compute the parameter \(t\) where the ray hits the two x-planes:
The idea is to calculate when the ray enters and exits the cube. The entry point is determined by the maximum of
the \(t_{\text{min}}\) values across all axes (because the ray must enter the cube from the farthest plane), and the
exit point is determined by the minimum of the \(t_{\text{max}}\) values across all axes (because the ray must
exit at the nearest plane):
If \(t_{\text{entry}} > t_{\text{exit}}\) or \(t_{\text{exit}} < 0\), the ray does not intersect the cube.
Final Cube Intersection Condition
To summarize, the cube-ray intersection works as follows:
Calculate \(t_{\text{min}}\) and \(t_{\text{max}}\) for each axis.
Compute the entry and exit points.
If the entry point occurs after the exit point (or both are behind the ray origin), there is no intersection.
-- A Cube defined by its minimum and maximum cornersdataCube=Cube{minCorner::Vec3,maxCorner::Vec3,cubeColor::Color,cubeReflectivity::Double}deriving(Show,Eq)instanceShapeCubewhereintersect(Rayod)(Cube(Vec3xminyminzmin)(Vec3xmaxymaxzmax)__)=letinvD=Vec3(1/xd)(1/yd)(1/zd)t0=(Vec3xminyminzmin`sub`o)`mul`invDt1=(Vec3xmaxymaxzmax`sub`o)`mul`invDtmin=maximum[minimum[xt0,xt1],minimum[yt0,yt1],minimum[zt0,zt1]]tmax=minimum[maximum[xt0,xt1],maximum[yt0,yt1],maximum[zt0,zt1]]iniftmax<tmin||tmax<0thenNothingelseJusttminnormalAt(Cube(Vec3xminyminzmin)(Vec3xmaxymaxzmax)__)p=let(Vec3pxpypz)=pinifabs(px-xmin)<1e-4thenVec3(-1)00elseifabs(px-xmax)<1e-4thenVec3100elseifabs(py-ymin)<1e-4thenVec30(-1)0elseifabs(py-ymax)<1e-4thenVec3010elseifabs(pz-zmin)<1e-4thenVec300(-1)elseVec3001getColor(Cube__color_)=colorgetReflectivity(Cube___reflectivity)=reflectivity
Tracing a Ray Against Scene Objects
Once we have rays and shapes, we can start tracing rays through the scene. The traceRay function checks each ray against all objects in the scene and calculates the color at the point where the ray intersects an object.
-- Maximum recursion depth for reflectionsmaxDepth::IntmaxDepth=5-- Trace a ray in the scene, returning the color with reflectionstraceRay::[ShapeWrapper]->Ray->Int->ColortraceRayshapesraydepth|depth>=maxDepth=Vec3000-- If we reach the max depth, return black (no more reflections)|otherwise=caseclosestIntersectionofNothing->backgroundColor-- No intersection, return background colorJust(shape,t)->lethitPoint=add(originray)(scalet(directionray))normal=normalAtshapehitPointreflectedRay=RayhitPoint(reflect(directionray)normal)reflectionColor=traceRayshapesreflectedRay(depth+1)objectColor=getColorshapeinadd(scale(1-getReflectivityshape)objectColor)(scale(getReflectivityshape)reflectionColor)whereintersections=[(shape,dist)|shape<-shapes,Justdist<-[intersectrayshape]]closestIntersection=ifnullintersectionsthenNothingelseJust$minimumBy(comparingsnd)intersectionsbackgroundColor=Vec30.50.71.0-- Sky blue background
Putting It All Together
We can now render a scene by tracing rays for each pixel and writing the output to an image file in PPM format.
-- Create a ray from the camera to the pixel at (u, v)getRay::Double->Double->RaygetRayuv=Ray(Vec3000)(normalize(Vec3uv(-1)))-- Render the scenerender::Int->Int->[ShapeWrapper]->[[Color]]renderwidthheightshapes=[[traceRayshapes(getRay(2*(fromIntegralx/fromIntegralwidth)-1)(2*(fromIntegraly/fromIntegralheight)-1))0|x<-[0..width-1]]|y<-[0..height-1]]-- Convert a color to an integer pixel value (0-255)toColorInt::Color->(Int,Int,Int)toColorInt(Vec3rgb)=(floor(255.99*clampr),floor(255.99*clampg),floor(255.99*clampb))whereclampx=max0.0(min1.0x)-- Output the image in PPM formatwritePPM::FilePath->[[Color]]->IO()writePPMfilenameimage=writeFilefilename$unlines$["P3",showwidth++" "++showheight,"255"]++[unwords[showr,showg,showb]|row<-image,(r,g,b)<-maptoColorIntrow]whereheight=lengthimagewidth=length(headimage)
Examples
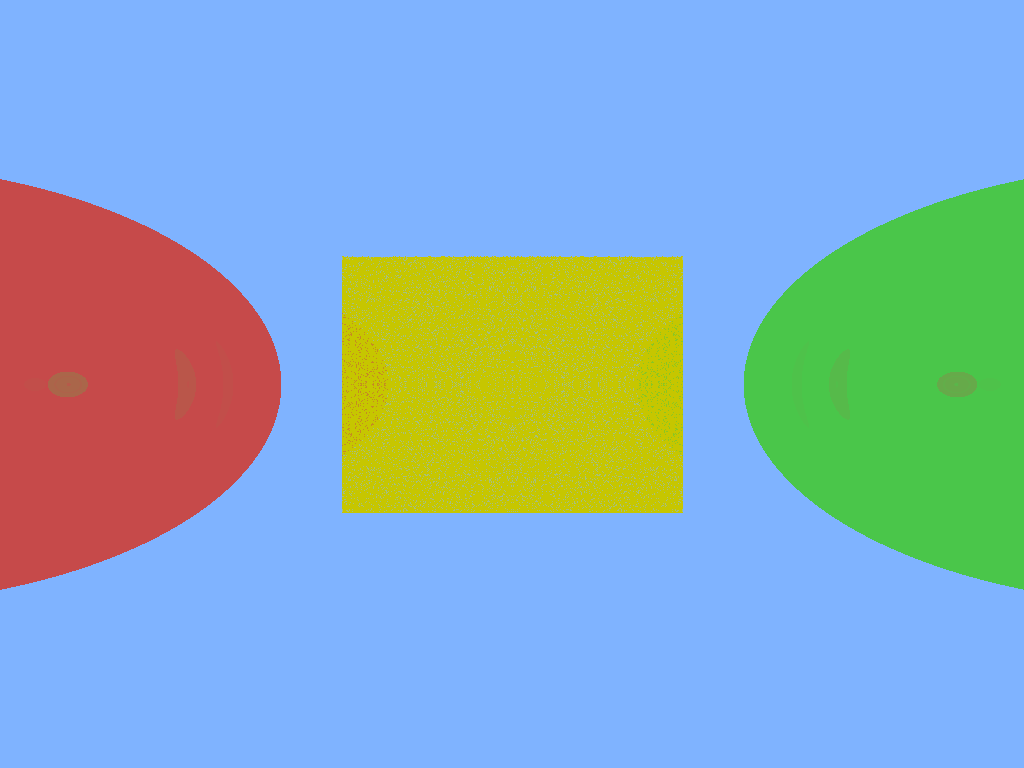
Here’s an example where we render two spheres and a cube:
main::IO()main=doletwidth=1024height=768shapes=[ShapeWrapper(Sphere(Vec3(-1.0)0(-1))0.5(Vec30.80.30.3)0.5),-- Red sphereShapeWrapper(Sphere(Vec310(-1))0.5(Vec30.30.80.3)0.5),-- Green sphereShapeWrapper(Cube(Vec3(-0.5)(-0.5)(-2))(Vec30.50.5(-1.5))(Vec30.80.80.0)0.5)-- Yellow cube]image=renderwidthheightshapeswritePPM"output.ppm"image
Conclusion
In this post, we’ve built a simple raytracer in Haskell that supports basic shapes like spheres and cubes. You can
extend this to add more complex features like shadows, lighting models, and textured surfaces. Happy ray tracing!