This is just a short tutorial on using the MapReduce operation from within the MongoDB environment.
What is it and how does it work?
MapReduce is a database operation. Its intended for performing higher-level (or more complex) aggregation tasks across huge data stores. You supply it with two functions, a map function and a reduce function and it will supply you with the aggregated result. As it’s defined from the MongoDB documentation, the operation takes the following form:
You can immediately see the first two parameters to this operation as the map function and the reduce function. The remaining parameter is focused on the delivery of the result back to you.
The Map Function
The map function is responsible for defining the data that you want to work with. For instance, if you’re interested in accumulating the sum of all products sold by their category you will want to return both the amount sold per line item as well as the product’s category.
Note the use of the emit function. Its use tells the MapReduce operation that the key for this process will be category and the value will be price. The value part of the emit function can also take form of a javascript object itself should you need to perform multiple aggregations across the same data set.
This particular map function gives us a count of 1 per result that comes out so we would be able to not only sum the price but find out how many items made up the sum as well.
The Reduce Function
The reduce function is responsible for performing the aggregation on the data emitted by the map function. It is passed the key-values emitted by the map function as parameters to it. Performing the reduce function to get the sum of all prices and the number of items making up the sum total would look like this.
varreduceFunction=function(key,values){outValue={total:0,count:0};// aggregate all of the values for this keyfor(vari=0;i<values.length;i++){outValue.total+=values[i].price;outValue.count+=values[i].count;}returnoutValue;};
All of the “magic” happens via-javascript. Pretty easy really.
Getting a result
Putting your map and reduce function together for the operation ends up looking like this (for a simple scenario).
This will get the process underway against the database. Once it’s finished doing the hard-yards, then you can start basing your aggregation reports off of the “res” variable that we built just above by doing the following.
db[res.result].find();
This is only a “scratch-the-surface” - “know enough to be dangerous” type write-up. MapReduce is a complex and powerful tool that you should be reading the official documentation about if you want to achieve ninja-like status.
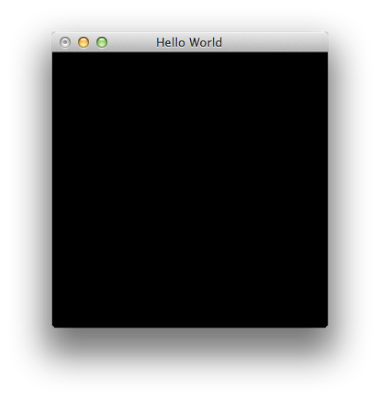
We’re into some of the real good stuff here. One of my favourite topics in computer programming is graphics (2d and 3d). In this post, I get to make a start on some fun stuff and learn some Haskell at the same time. We’re going to open an OpenGL window, clear the back buffer out and flip.
The code
importGraphics.Rendering.OpenGLimportGraphics.UI.GLUTmain::IO()main=do-- initialize openGL (progname,_)<-getArgsAndInitialize-- open up the application window createWindow"Hello World"-- set the render proc and run the main loop displayCallback$=displaymainLoopdisplay::IO()display=do-- clear the buffer and flip clear[ColorBuffer]flush
Ok, ok, fair enough - this is almost a direct-rip from the [Haskell Wiki](http://www.haskell.org/haskellwiki/OpenGLTutorial1_, I’m not claiming it as my code. It’s more of a bookmark as a good foot-hold in the OpenGL-Haskell marriage!
Compilation
Getting your application compiled is cake, just make sure you specify GLUT as a package.
As a bit of a bookmark to myself, I wanted to make mention of a study group that an old colleague had brought to my attention.
The wiki that has been put up for this project has been a great source of home-work as I’ve gone through the book. I haven’t yet made it to the end of the book but am working on it. It’s been important for me to have some home work to do on this topic as I don’t write Haskell professionally. Without something flexing my Haskell muscles, the knowledge tends to go on holiday rather quickly.
The learn repository has all of the source code and documents for the course.
When constructing your own types in Haskell, you can make your type support a particular behavior by making it an instance of the behavioral type class required. I’ll walk through each of these derivable behaviours and how they can help.
Eq gives your type a sense of equality amongst values of the same type. It allows you to use the == operator as it was intended, returning you a boolean.
dataEmployee=Employee{firstName::String,lastName::String,department::String}deriving(Eq)letmary=Employee{firstName="Mary",lastName="Jones",department="Finance"}letjohnIT=Employee{firstName="John",lastName="Smith",department="IT"}letjohnHR=Employee{firstName="John",lastName="Smith",department="HR"}-- would be Falsemary==johnIT-- would be TruejohnIT/=johnHR-- would be TruejohnHR==Employee{firstName="John",lastName="Smith",department="HR"}
From now on, == will do a comparison on the contents of the three strings in the Employee record for us.
In my personal experience when defining types, I would be out of my mind not to make them derive Show. Show allows a value of your type to be put into string format - very useful for debug situations.
dataEmployee=Employee{firstName::String,lastName::String,department::String}deriving(Show)letmary=Employee{firstName="Mary",lastName="Jones",department="Finance"}-- Will print "Employee { firstName = "Mary", lastName = "Jones", department = "Finance" }"putStr$(showmary)
Just for the printing value, you can see how Show is worth its weight in gold.
Read provides the reverse-service of what Show does. You’ll be able to take a type in its serialized format and re-construct a type from it. Again, rather useful in debug situations.
dataEmployee=Employee{firstName::String,lastName::String,department::String}deriving(Show,Read)letmaryStr="Employee { firstName = \"Mary\", lastName = \"Jones\", department = \"Finance\" }"-- mary will now be a constructed Employee letmary=read$maryStr::Employee
I’ve also used this to do user-input rather cheaply. Probably not quite a “production solution” though having your users enter type data directly.
Bounded will give your type a sense of the lowest and highest values achievable. You’ll be able to ask questions of the type to see what these corresponding values are.
Enum will give your type a sense of the predecessor and successor values. This is most important when dealing with ranges in using your type. Take a look at the following deck assembly. Without Bounded the list comprehensions would not be possible and this code would be a lot more verbose.
-- | Makes an ordered deck of cards makeDeck::[Card]makeDeck=[Cardvs|v<-[Ace..King],s<-[Heart..Spade]]
That’s derived instances for you anyway. They’re a great help when constructing your own types in Haskell. I think an important follow up to this blog post is being able to use these classes in conjunction with the instance keyword so that we can supply the implementation to the definition. Using the card example, we could supply an Eq and Show instance as follows.
dataCardSuit=Diamond|Heart|Club|Spade-- Provide eq implementationinstanceEqCardSuitwhereDiamond==Diamond=TrueHeart==Heart=TrueClub==Club=TrueSpade==Spade=True_==_=False-- Provide show implementationinstanceShowCardSuitwhereshowDiamond="Diamonds"showHeart="Hearts"showClub="Clubs"showSpade="Spades"
You can see here that it’s quite counter-productive to supply our own Eq implementation, but if we did have some funky rules on how we wanted equality operators to work it would be worth it. In the show implementation, I’ve tried to make the suits read a little more humanly. Around the card table, you would normally hear someone say “Do you have a 2 of clubs?” rather than “Do you have a 2 of club?”. The trailing “s” has been added in the show implementation. Neat.
Functor is applied to wrapper types. You’ll commonly see examples used with Maybe. You’ll use Functor when ever you need to supply an fmap implementation. Here is a simple example that creates a wrapper data type.
In a previous post, I had written about [Folding in Haskell](/2012/12/27/folding-in-haskell.html] which in itself is a very powerful tool. We spent a brief moment in that tutorial actually working through a problem and writing the folding process out long hand.
Well, scanning scanl and scanr does this for you! It shows you the reduction steps in the form of an array returned back to you.