Scanline based filled Polygons
19 Nov 2013Introduction<
In a previous post I laid down some foundation code to get access to the pixel buffer when in context of a HTML canvas. Good for those who have experience writing graphics code directly against the video buffer - it almost feels like you’re writing to 0xA000 :-)<
Today’s post will focus on drawing polygons to the screen using scan lines.
Scan lines
The whole idea here is that a polygon can be represented on screen as a series of horizontal lines. Take the following picture for example. You can see the red and blue horizontal lines making up the filling of the polygon.

So, to define this all we do is take note of the minimum and maximum x values for every y-axis instance that there is a line on. We run through the array of values drawing horizontal lines at each instance, and then we have a polygon on screen - pretty easy.
Code
First of all, we’ll define our drawing primitive for a horizontal line.
var hline_c = function(x1, x2, y, w, r, g, b, a, buffer) {
   // calculate the offset into the buffer
   var ofs = (x1 + y * w) * 4;

   // draw all of the pixels
   for (var x = x1; x <= x2; x ++) {
      buffer[ofs] = r;
      buffer[ofs + 1] = g;
      buffer[ofs + 2] = b;
      buffer[ofs + 3] = a;

      // move onto the next pixel
      ofs += 4;
   }

};
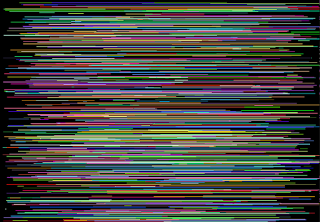
We pass in the two x (x1 and x2) values for the line to go between, the y value for the line to sit on. To help with the offset calculation we also pass in the width w to correctly calculate the pitch. Finally the colour components and buffer to draw to are passed in. Setting this code up in a run loop, you end up with something like this:

Yep, there’s lots of horizontal lines. Referring to our horizontal line diagram above, we still need a way to walk the edges of the polygon so that we can get the minimum and maximum x values to start drawing. Because our basic unit is the pixel (considering we’re rasterising to a pixelated display), we can easily calculate the gradient of the line that we need by:
(change in x) / (change in y)

For a line given by (x1, y1) - (x2, y2), this translates into:
(x2 - x1) / (y2 - y1)
Taken out of context of maths, this just says to us: we want to walk from x1 to x2 using (y2 - y1) steps.
var scanline_c = function(x1, y1, x2, y2, miny, edges) {

   // flip the values if need be
   if (y1 > y2) {
      var y = y1;
      y1 = y2;
      y2 = y;

      var x = x1;
      x1 = x2;
      x2 = x;
   }

   // start at the start
   var x = x1;
   // change in x over change in y will give us the gradient
   var dx = (x2 - x1) / (y2 - y1);
   // the offset the start writing at (into the array)
   var ofs = y1 - miny;

   // cover all y co-ordinates in the line
   for (var y = y1; y <= y2; y ++) {

      // check if we've gone over/under the max/min
      if (edges[ofs].minx > x) edges[ofs].minx = x;
      if (edges[ofs].maxx < x) edges[ofs].maxx = x;

      // move along the gradient
      x += dx;
      // move along the buffer
      ofs ++;

   }

};
From the code above, we treat x1, y1 as the starting point and x2, y2 as the ending point. Our for-loop is biased in the positive direction, so it’s important for us to flip the values if they come in inverted. The edges array that’s passed in is prepared by the caller of this function. It’s initialized with very unreasonable minimum and maximum values. We than run over all 4 polygon edges
(x1, y1) -> (x2, y2)
(x2, y2) -> (x3, y3)
(x3, y3) -> (x4, y4)
(x4, y4) -> (x1, y1)
At the end of this process, edges is full of minimum/maximum values ready for drawing. Here’s the code for the polygon.
var polygon_c = function(x1, y1, x2, y2, x3, y3, x4, y4, w, r, g, b, a, buffer) {
   // work out the minimum and maximum y values
   var miny = y1, maxy = y1;

   if (y2 > maxy) maxy = y2;
   if (y2 < miny) miny = y2;
   if (y3 > maxy) maxy = y3;
   if (y3 < miny) miny = y3;
   if (y4 > maxy) maxy = y4;
   if (y4 < miny) miny = y4;

   // the height will determine the size of our edges array
   var h = maxy - miny;
   var edges = new Array();

   // build the array with unreasonable limits
   for (var i = 0; i <= h; i ++) {
      edges.push({
         minx:  1000000,
         maxx: -1000000
      });
   }

   // process each line in the polygon
   scanline_c(x1, y1, x2, y2, miny, edges);
   scanline_c(x2, y2, x3, y3, miny, edges);
   scanline_c(x3, y3, x4, y4, miny, edges);
   scanline_c(x4, y4, x1, y1, miny, edges);

   // draw each horizontal line
   for (var i = 0; i < edges.length; i ++) {
      hline_c(
         Math.floor(edges[i].minx),
         Math.floor(edges[i].maxx),
         Math.floor(i + miny),
         w, r, g, b, a, buffer);
   }
};
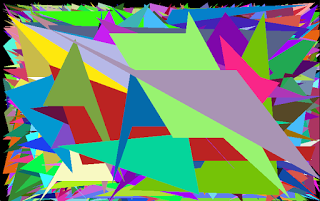
This really is just putting all the pieces together. The building of the edges array is important - as is using the y co-ordinate (adjusted back to zero by proxy of the minimum y value) as an array index. Once you’ve got this setup in a random position & colour loop, you’ll end up with something like this:

mmmm… Tasty.