Logging is probably one of the most important services you can offer your application. Your programs have information that needs to be expressed to the user, in fact in parts it’s important for your program to be almost paranoid that it hasn’t said anything.
All things should be controllable though. Putting your application into production with a paranoid level of logging doesn’t make for very happy sys-admins, so this is left as an exercise to the reader. Here, I want to present you a configurable but most importantly, a usable logging framework that you can drop into your C projects without much effort at all. Let’s go through the header!
#ifndef __libced_log_h_
#define __libced_log_h_
#include<unistd.h>
#include<time.h>
#include<stdio.h>
#include<stdarg.h>
#include<string.h>/** Logs a line of text */void_ced_log(FILE*file,constchar*fmt,...);#define ced_logf(f, ...) _ced_log(f , __VA_ARGS__)
#define ced_log(...) _ced_log(NULL, __VA_ARGS__)
#endif /* __libced_log_h_ */
This is very simple stuff. Only one function _ced_log is defined that’s used by this header. The user is encouraged to access the logging functionality by proxy of the macros defined (ced_log and ced_logf). ced_log takes in the same parameter structure as a printf call allowing the very natural format strings to be used for your logging. ced_logf takes the structure of fprintf where you can direct your log information to a specific file handle. Again, with some small modifications you can direct all of your logs into a file by default. I just like to throw all mine out to the console. I hate surprises (in development)!! The implementation for this library piece is also very simple with only one function needing to be filled out:
#include"../include/log.h"/** */void_ced_log(FILE*file,constchar*fmt,...){va_listap;time_tt;chardatestr[51];/* determine if we just go to std error */file=(file==NULL)?stderr:file;/* datetime & pid formatting */t=time(NULL);tzset();strftime(datestr,sizeof(datestr)-1,"%a %b %d %T %Z %Y",localtime(&t));fprintf(file,"%s [%d]: ",datestr,getpid());/* draw out the vararg format */va_start(ap,fmt);vfprintf(file,fmt,ap);va_end(ap);/* bump to the next line */fprintf(file,"\n");}
Here is where you can really make this module your own. The default format that I have going in here has the current process ID and date/time stamp. I find these very useful during the fault-finding process once a unit of software is running. The most important thing to draw from this is you can change the default makeup of a log line by changing this code. I use this code just about everywhere. I use it so much that I have included it in my library that it available from github here.
It’s a very well studied topic in the C field. Many people have written tutorials on how to use function pointers and what they are. The function pointer tutorial is always a good read for the uninitiated or seasoned professional who’s function pointer theory is a little rusty.
This write up isn’t going to try and fill the shoes of the basic-square-1-hello-world style tutorial. I just wanted to talk about how I’ve used them to better a piece of code and make a system a bit more extensible overall.
What are they?
Like any data pointer a function pointer is an address. It’s an address that will point to the entry-point of some code. It’s that simple. The complexity comes into the argument when you start to add C syntax. C likes to be very descriptive with the data that you’re feeding functions and function parameters are no exception.
/* a function that takes no arguments and returns no value called "func1" */void(*func1)()=NULL;/* a function that returns an integer and takes two integer arguments called "func2" */int(*func2)(int,int)=NULL;
Ok, simple example time over. It’s onto what this article is really about.
Problem description
I have a game that has a few game states. They look like this:
Introduction credits
Game title
Menu
Game play
Game over
High score board
Each of these states all have functionality that they need to accomplish. The basic specification for a game state goes as follows:
Needs to be able to be initialized
Needs to be able to have its resources freed (tear down)
Needs to be able to update its internal logic
Needs to be able to render its internal state
Needs to be able to respond to events (keyboard, etc)
Good. We’ve established that we have a set of game states and they all attract a set of actions that we’d like them to perform.
Getting down to it
So, let’s define the actions first (as function pointers) and we can then fill in the implementation later:
/* function signature for initializing this state */typedefvoid(*init_func)();/* function signature for tearing down this state */typedefvoid(*teardown_func)();/* function signature for the render function */typedefvoid(*render_func)();/* function signature for the update function */typedefvoid(*update_func)(Uint32,Uint32);/* function signature for the keyboard input event */typedefvoid(*keyboard_func)(SDL_KeyboardEvent*);
Slightly different from above is the use of the “typedef” keyword. This allows us to define these function pointers as types so that we can treat them just as we do any other type. These types that we’ve defined are the outline to what we need. We still have the colour in, but we’ve got a framework ready to go. Lets define our function pointer variables using the types we defined above.
/* we need to define the pointers themselves so that
the game loop can read them and the game module can
write to them */init_funcgame_init=NULL;teardown_funcgame_teardown=NULL;render_funcgame_render=NULL;update_funcgame_update=NULL;keyboard_funcgame_keyboard=NULL;
Simple enough. Now that we have these variables define (close-by to our game loop), we can write a game loop that will look a little something like this:
/* runs the game loop */voidrun_game(void){SDL_Eventevent;while(!game_finished){/* process events here *//* if we've got a keyboard event process
and we've got a valid keyboard handler */if(game_keyboard!=NULL){game_keyboard(event.key);}/* if we've got a valid update function, update
the game logic */if(game_update!=NULL){game_update(frame,total);}/* if we've got a valid render function, render
the game state to screen */if(game_render!=NULL){game_render();/* flip backbuffer to front */}}}
This is psuedo code really. There’s a whole heap of infrastructure that you’ll need in order to make this work. You can see that only 3 of the functions we require are being are being used at the moment. We still need to get the init and teardown involved. The game module also needs a way to shift between game states. Thankfully, both of these functions come together in the one function:
/**
* Sets the handlers for the render, update and
* keyboard */voidset_game_state(intstate){/* if we have a valid teardown function to call,
call it now */if(game_teardown!=NULL)game_teardown();/* based on the requested state */switch(state){caseGAME_STATE_INGAME:/* assign the game handlers over */game_init=init_game;game_teardown=teardown_game;game_render=render_game;game_update=update_game;game_keyboard=keyboard_handler_game;break;default:/* clear out any of the game state */game_init=NULL;game_teardown=NULL;game_render=NULL;game_update=NULL;game_keyboard=NULL;break;}/* if we've got a valid initialization routine,
call it now */if(game_init!=NULL){game_init();}}
So, this function tearsdown the existing game state (if we have a state), and initializes if we initialize to a valid state. Easy!! Well, this has been just one possible use for function pointers. You can do so much, much more with them, but I thought I’d share my use of them here!
Just working on a “build your own clone” style tutorial and going over some older code here, I thought it’d be interesting to note some funky work I’d done with macros. When you’re working with 2-d array style states you get very good a writing for-loops over and over and over and … So, thinking about this in a very generic sense - take a look at this macro
#define FIELD_WIDTH 12
#define FIELD_HEIGHT 18
/* grabs an element from the field */#define field_block(x, y) (_field_blocks[(y * FIELD_WIDTH) + x])
/* iterates over the field */#define enum_field_blocks(x, y, o, fn) \
o = 0; \
for (y = 0; y < FIELD_HEIGHT; y ++) { \
for (x = 0; x < FIELD_WIDTH; x ++) { \
fn \
o ++; \
} \
} \
Working your way through the enum_field_blocks macro here, the parameters are:
A horizontal axis iterator x
A vertical axis iterator y
A memory location (array index) iterator o
and fn
So, what’s fn? fn here allows the developer to specify what they want to execute inside the nested for loops:
If you’re thinking “why didn’t he just use memset to set all of the items in this array to NULL” - you’ve missed the point. The example is quite a bad one, I agree, but it does demonstrate that you can write any code that you’d like and have it execute for every item in the specific array cutting down on boilerplate that you have to write (just get the C pre-processor to do it for you).
The CPU itself is an impressive piece of kit just by itself however it does struggle to do complex floating point mathematics. Chip designers noticed this deficiency pretty quickly and bolted on a floating-point arithmetic unit. It should be noted at this point that many, many other tutorial/article writers have gone into great depth explaining how to program FPU’s and they have been great references to me in previous times:
Anyway, this blog post is just going to show you a few nuggets that you can use straight away. It’s always fun seeing this stuff in action. This snippet will sum (accumulate) together an array of doubles.
; entry conditions; edx points to an array of doubles; ecx holds the number of items in the array; set st0 to zerofldznext:; add the next double to st0faddqword[edx]; progressaddedx,8dececxjnznext; at this point, st0 holds the sum
This following snippet will show you a simple addition, subtraction, multiplication and division. You’ll notice a pretty distinct pattern in what to do in these situations. It’ll follow:
Load the first term (fld)
Apply the operator (fadd,fsub,fmul,fdiv) with the second term
With a bit of extra help from the C library, you can print out values that you’re using in the FPU. The following snippet prints PI to the console.
; compiled on linux 64 bit using the following;; nasm -f elf32 print.asm -o print.o; gcc -m32 print.o -o print;[bits32]section.textexternprintfglobalmainmain:; load pi into st(0)fldpi; prepare some space on the stacksubesp,8; to be able to push st(0) in therefstpqword[esp]; get the string format on the stack as wellpushformat; print the stringcallprintf; repair the stack; 4 bytes memory address (for the format); + 8 bytes memory for the float; =========; 12 bytesaddesp,12; exit without errorxoreax,eaxretsection.dataformat:db"%.20g",10,0
As I find other snippets in old pieces of code, I’ll be sure to add them to this page.
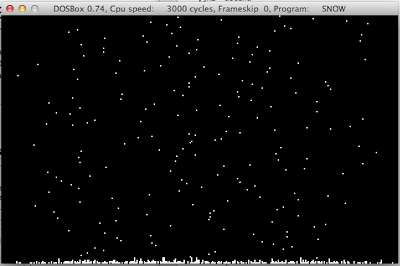
A very simple effect this time around. It’s snow flakes. The operating premise for the effect is very simple and goes like this:
Generate 1 new snow flake at the top of the screen at every frame
A snow flake has an absolute floor of the last line in video memory
A snow flake should come to rest if it lands on top of another
That’s it! So, immediately we need a way to get random numbers. We’re using a 320x200 screen here and my dodgy routine for getting random numbers only returns us 8 bit numbers (which gets us to 255). We need to add some more width to these numbers if we expect to be able to randomize across the whole 320 column positions. Calling the random port twice and adjusting the resolution of the second number should do it for us, such that:
8 bits (256) and 6 bits (64) will give us 320 - or the ability to add using 14 bits worth of numbers, which in this configuration takes us up to 320. Perfect.
Here’s the code!
get_random:; start out with ax and bx = 0xorax,axxorbx,bx; get the first random number and; store it off in blmovdx,40hinal,dxmovbl,al; get the second random number and; store it off in al, but we only ; want 6 bits of this numbermovdx,40hinal,dxandal,63; add the two numbers to produce a; random digit in rangeaddax,bxret
Excellent. We can span the breadth of our screen with random flakes. Now it’s time to progress them down the screen. Here’s the main frame routine to do so.
no_kbhit:; put a new snowflake at the top ; of the screencallget_randommovdi,axmovbyteptres:[di],15decend:; we can't move snowflakes any further; than the bottom of the screen so we; process all other linesmovdi,63680movcx,63680next_pixel:; test if there is a snowflake at the ; current locationmoval,es:[di]cmpal,0jeno_flake; test if there is a snowflake beneath; us at the momentmoval,es:[di+320]cmpal,0jneno_flake; move the snowflake from where we are ; at the moment to one line below usxoral,almovbyteptres:[di],almoval,15movbyteptres:[di+320],15no_flake:; move our way through video memorydecdideccxjnznext_pixel; check for a keypressmovah,01hint16hjzno_kbhit
The code itself above is pretty well commented, you shouldn’t need me to add much more here. There are a couple too many labels in the code, but they should help to add readability. I’ll leave it as an exercise to the reader to implement different speeds, colours and maybe even some horizontal movement (wind). Cool stuff.